Posts tonen met het label Men. Alle posts tonen

maandag 12 september 2016

Designteam get-together workshop

Vorige maand heeft Louise je haar boekje laten zien dat we gemaakt hebben tijdens twee van onze designteam get-togethers, die we een paar keer per jaar houden. Je kunt het bericht hier nog eens teruglezen.
Hieronder zie je stap voor stap hoe mijn tag gemaakt is.

Last month Louise showed you her design team booklet we made on two design team get togethers. You can read this post here.
Below is a step-by-step of how my tag is made.


Stap 1: scheur een paar repen boekpapier en plak deze op de tag (de tag is 8,5 x 16 cm). Let op: gemorste lijm blijft zichtbaar bij het sponzen straks. Overhangende stukken boekpapier afknippen.

Step 1: Tear some strips of book paper and glue to the tag The tag is 8,5 by 16 cm). Do not spill glue, it remains visible when you apply the distress inks. Cut book paper off along the edges of the tag.

Stap 2: Spons de tag met distress inkten (hier groen en blauw) en stempel een deel van het gezicht met zwarte inkt. Hou er rekening mee dat de druppels boven het gezicht en de man onder het gezicht komen.
Step 2: Sponge the entre tag with distress inks (I used green and blue) and stamp part of the face in black. Decide on the right placement: the droplets have to fit above the face and the man below the face.
Stap 3: Stempel de overige onderdelen in zwart: druppels boven en diverse randen rondom.
Step 3: Stamp the other images in black: droplets at the top, various images around the other edges.
Stap 4: Gebruik templates en distress inkt op de achtergrond. Niet op het gezicht.
Stap 4: Use templates and distress ink for the background. Avoid the face.
Stap 5: Stempel tekst en de man op een apart stukje papier. Knip de tekst in reepjes en spons de randjes zwart. Maak van zwart cardstock een "fotoframe" met behulp van een EK pons. Een gewoon zwart randje kan natuurlijk ook.
Step 5: Stamp the text and the man on a piece of paper. Cut the text into strips and sponge around all edges. Use a punch to make a filmstrip from black cardstock, or make a plain black mat.
 Stap 6: Plak alles op de tag. Zorg ervoor dat de eerste regel van de tekst bovenaan het gezicht komt, om het harde randje te verbergen. Zo komt de "foto" onderaan over het harde randje.
Step 7: Glue all parts to the tag. Make sure to glue the first word strip over the top hard edge of the face and the "photograph" over the lower hard edge.
 Stap 8: Be-inkt alle randen met zwart en plak op een zwarte kaart. Klaar!
Step 8: Ink all edges with black and adhere to a black card. Done!
Stempels/ Stamps:

Morgen laat ik je graag nóg een tag zien met deze techniek.
Tomorrow I would like to show you another tag with this technique.

Groetjes, Ellen
woensdag 7 oktober 2015

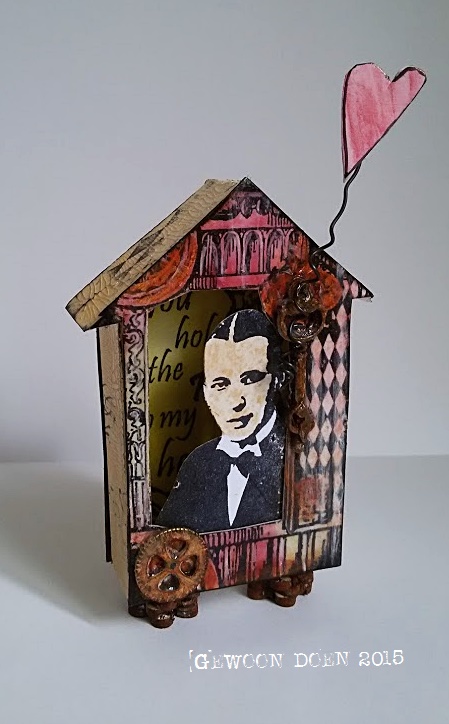
Houses

Geïnspireerd door de mooie kijkdoosjes van Renje maakte ik dit mini exemplaar.

Inspired by the beautiful shadow boxes of Renje, I made this miniature.


Ik maakte daarbij gebruik van deze twee sheets

I used these two sheets 

Houses: Cafe & Key 
 

donderdag 19 maart 2015

Connected steampunk ATC's

Letterlijk uit de oude doos : Een A4  vol met ATC's die in elkaar overlopen.
Heel wat stempels heb ik ervoor gebruikt : Friends 2, Man,  Men, Numbers, Steampunk 1 en Steampunk 2.


Liesbeth XX

vrijdag 16 januari 2015

Reminder challenge # 53 Something old something new

Het leuke van stempels is dat je ze eindeloos kunt combineren. 

The fun thing of rubber stamps is that you can combine them endlessly.


Ook hier weer oude (voor 2014) en nieuwe (2014) Art Journey stempels gecombineerd.

Here again, I have old (before 2014) and new (2014) rubber stamps combined .

Ik ben benieuwd naar jullie combinaties!
Klik HIER voor het officiële challenge bericht.

I'm curious about your combinations!
Click HERE for the official challenge post.

Gebruikte Art Journey stempels: Eyes, Men en Vintage bottles

Used Art Journey stamps: Eyes, Men en Vintage bottles

zondag 8 juni 2014

Tunnel card

Voor de workshop ,tunnelkaart' van afgelopen vrijdag heb ik vorige week nog een extra voorbeeld gemaakt met héél veel van de mooie Art Journey stempels ! O.a. ook de nieuwe Vintage cars. Maar ook weer wat schitterende ,oudjes' uit de kast gehaald !

For a workshop last week, I made this example of a tunnel card, I used lots of beautiful Art Journey stamps !


Liesbeth XX

maandag 18 november 2013

Friends/17

Voor de zeventiende verjaardag van mijn grote neef, maakte ik deze "Friends" kaart. Hij past prima in de november challenge (templates), maar daar kan ik nu natuurlijk niet meer aan mee doen...
I made this "Friends"card for the seventeenth birthday of my nephew. You can still join us for the November Challenge: Masks.
  • Art Journey stempel: Friends
  • Distress inkt: Faded Jeans, Walnut Stain
  • Templates: Numerals, Gears
Have a nice day!!
Anette

woensdag 11 september 2013

Art Journey Label

A tag I made with 2 stamp sets from Art Journey.   
I stamped the gentlemen on a gelatin print with Ranger Archival ink #Jet Black.  
Een label gemaakt met 2 stempelsets van Art Journey.  
De heren gestempeld met Ranger Archival inkt #Jet Black.

I looked for matching Distress inks to stamp the leaves, and to ink the background.
Distress inkten in dezelfde kleuren als de print gezocht om de takjes te stempelen en de achtergrond te sponzen.


Art Journey stamps:  Postcard
I used:
Art Journey stamps:  Postcard, Men (gentlemen & leaves)
Distress Ink
Archival Ink #Jet Black
Acrylic Paint:  Talens Amsterdam, Caran d'Ache
TCW stencil:  Honeycomb
Oval Punch

vrijdag 24 augustus 2012

Mannenkaart

Een mannenkaart, gemaakt met 3 Art Journey sets:
A masculine card, made with 3 Art Journey sets:

*****

En ik wil jullie er aan herinneren dat de foto uitdaging nog een paar dagen loopt.  Misschien ben je nu net terug van vakantie.  Dus als je nog een mooie foto vindt, pak dan je Art Journey stempels en maak een creatie om mee te doen.
Alles over de uitdaging, met voorbeelden en mooie bijdragen vind je hier:  KLIK
And a reminder about our Photo challenge, you still have a few days to enter.  So look for a beautiful or fun picture, grab some Art Journey stamps and create a piece to enter the challenge.
More info, samples and entries are in this blogpost:  CLICK

donderdag 24 februari 2011

Fijne dag!


All stamping on this card is done with StazOn #Timber Brown. I used water colours and Distress Inks on the background.
Alles is gestempeld met StazOn #Timber Brown. Achtergrond gemaakt met aquarelverf en Distress Inkt.

Art Journey stamps: Tree, Dutch Seals, Men.